
Backyard Astronomy Basics for Clear Night Sky Observation
Curious what you can really see from your yard at night? This guide to backyard astronomy explains how to use star charts, simple binoculars, beginner telescopes, and a stargazing journal to identify constellations and plan realistic night sky observations from home.
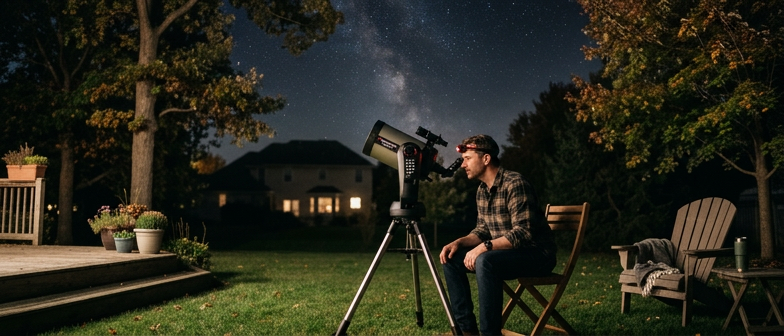
This story is part of Esgamesol's practical reading library across everyday topics.
Getting Started with Backyard Astronomy
Backyard astronomy is the practice of observing the night sky from familiar spaces such as a yard, driveway, or nearby open area. It often begins by simply stepping outside, letting your eyes adjust to the dark, and noticing what is visible without equipment. Depending on weather, city lighting, and obstructions like trees or buildings, you may see only the brightest stars and planets, or a surprisingly rich sky with many recognizable patterns. Expectations matter: in typical suburban conditions, faint galaxies and nebulae are difficult or impossible to detect, while the Moon, bright planets, and major constellations can still be satisfying sights. Over time, watching how the sky changes with the seasons becomes part of the appeal.
Safe and comfortable night sky observation relies on a few basic habits. Never look at the Sun through a telescope, binoculars, camera lens, or other optical device without a proper solar filter, because concentrated sunlight can permanently damage eyesight very quickly. At night, use a dim red flashlight or a phone with a red-screen mode to preserve night vision and move carefully to avoid tripping on uneven ground or outdoor equipment. Reducing unnecessary local lights, such as unneeded porch lamps, can noticeably improve what you see, though safety needs, local rules, and neighbors’ preferences may limit how dark you can make your surroundings. Even with some light pollution, short, regular sessions in your own backyard can build familiarity with the sky and provide a practical start for later use of star charts, binoculars, or a small beginner telescope.
Learning the Sky with Your Eyes and Star Charts
Beginning backyard astronomy with only your eyes builds a basic sense of direction before any equipment is added. After 15 to 30 minutes in the dark, more stars and faint patterns appear, and it becomes easier to notice how bright stars form shapes and how the sky seems to rotate around the north. Watching how the same objects rise and set at different times over the year creates a mental picture of seasonal changes, so later use of binoculars or a telescope feels more organized instead of random scanning.
Star charts turn scattered points of light into a usable map. Printed charts often show the sky by direction and season, marking bright stars, major constellations, and sometimes planets. To use them, you face the direction labeled on the chart, then look for large, obvious patterns such as the Big Dipper or Orion before moving to fainter shapes. Digital sky maps and mobile apps can add labels and show motion over time, but they rely on accurate device settings, and bright screens can disrupt night vision unless dimmed and switched to a red or dark display mode.
Identifying constellations is easier when you focus on one region at a time and revisit it on several nights. You can start with a familiar pattern, outline it in the sky, then use it as a reference to find neighboring constellations shown on your chart or app. Over time, overlapping patterns form a network that helps you recognize the sky in different seasons or from different observing locations. Simple visual observing has limits under city lighting, so not every star on a chart will be visible, but partial patterns still guide you and support a gradual, ongoing learning process.
| Method | Main Use | Best For | Key Advantage | Main Limitation |
|---|---|---|---|---|
| Printed star chart | Planning sky tour | Quiet backyard sessions | No battery or updates needed | Fixed layout, less flexible |
| Seasonal sky wheel | Learning seasonal changes | Beginners building basics | Shows big-picture patterns | Less detail on faint stars |
| Mobile sky app | Interactive sky navigation | Tech-comfortable users | Search and real-time labels | Screen glow affects night vision |
| Red-light chart use | Night sky observation | Long dark-adapted sessions | Keeps eyes adjusted | Requires extra light source |
| Paper chart plus notes | Stargazing journal support | Tracking learning progress | Simple record of constellations | Manual updates only |
Constellation Identification Basics
Constellations are officially defined regions of the sky, but from a backyard they appear as patterns linking stars that only seem close together. In reality these stars can lie at very different distances and are not bound in a single group. It helps to imagine the sky as a map in which each constellation marks a particular area, giving you visual reference points rather than clusters of stars sitting side by side.
To start identifying constellations, use printed star charts or a simple sky map app and work outward from bright, familiar shapes. Many beginners use the Big Dipper, the Summer Triangle, or Orion’s Belt as anchors, then match nearby stars to what is drawn on the chart. Spend each session on one region, noting how shapes sit relative to the horizon and cardinal directions. With repeated observations, you gradually build a mental map of the night sky.
Using Astronomy Binoculars and Other Simple Gear
Astronomy binoculars are a practical way to begin backyard observing because they are light, simple to handle, and show a wide section of the sky. Moderate magnification with reasonably large lenses can reveal star clusters, bright nebulae, and Jupiter’s larger moons under dark, steady conditions, though local light pollution strongly affects how much detail appears. The wide field makes it easier to sweep along the Milky Way, match what you see to a star chart, and notice how patterns of stars link one constellation to another. At the same time, binoculars have limits: fine planetary features remain unresolved, very faint objects often disappear in bright suburbs, and hand shake can make stars shimmer or drift, so it is helpful to focus on larger, brighter targets.
Simple accessories make this kind of night sky observation more comfortable and consistent. A stable tripod or monopod with a suitable adapter reduces arm strain and keeps the view steady, especially when looking high overhead for more than a few moments. A reclining chair supports your neck and shoulders while you slowly scan the sky, and warm clothing or blankets help because bodies cool quickly when sitting still at night. A small red-beam flashlight lets you read printed charts or notes without greatly disturbing dark adaptation, while a basic stargazing journal provides a place to record dates, sky conditions, and what you viewed through your binoculars, encouraging more careful backyard astronomy.
Beginner Telescope Setup and Safe Use
For a first backyard telescope, simple designs such as small refractors or tabletop Dobsonian reflectors are usually easier to handle than complex computerized models. A solid mount is more important than very high magnification, because an unsteady tripod makes views shaky and frustrating. Set up on firm ground away from bright lights, and give the telescope time to reach outdoor temperature so the image is steadier. Wide, low to medium power views are generally most useful for night sky observation, because they make it easier to find and follow objects.
Basic setup starts with leveling the tripod or base, attaching the telescope securely, and aligning the finderscope or red‑dot finder in daylight with a distant object such as a tree or building. This makes aiming at night much easier. When observing, begin with your lowest power eyepiece, center the target, then move to higher power only if the view remains bright and sharp. Track objects by gently nudging the mount rather than grabbing the tube abruptly, which helps keep vibrations low.
Safe use is essential in backyard astronomy. Never look at the Sun through an unfiltered finder, telescope, or binoculars, because concentrated sunlight can cause permanent eye damage very quickly. In the dark, watch for tripod legs, cords, and uneven ground to avoid tripping, and give your eyes time to adjust to low light before moving around. Set realistic expectations for small beginner instruments: the Moon, bright planets, and some star clusters can appear detailed, while faint galaxies and nebulae often look like subtle gray patches rather than dramatic images.
Step-by-Step Alignment and Focusing
Set the beginner telescope on stable ground and level the tripod so it does not wobble during night sky observation. Attach the finder scope or red-dot finder, then in daylight point the main telescope at a distant, safe object such as a faraway tree or building, never the Sun. Center the object in a low-power eyepiece and adjust the finder until that same object is centered there as well, tightening screws just enough to hold alignment.
After dark, select an easy target like the Moon or a bright star high above the horizon, still avoiding the Sun even during twilight. Use the finder to place the target in the middle of the view, then look through a low-power eyepiece and slowly adjust focus until it appears sharp. Expect some blur from air turbulence, small vibrations when you touch the telescope, and tighter views at higher magnification.
Q&A
-
What is backyard astronomy and what can I see from home?
Backyard astronomy means observing the night sky from places like a yard, balcony, or driveway. In a typical suburb you can clearly see the Moon, bright planets, and the main constellations, while very faint galaxies and nebulae are often hidden by city lights. -
How do star charts help with night sky observation?
Printed charts or apps act like maps, showing how bright stars relate to directions and the horizon. Matching these patterns with what you see overhead helps you learn where constellations are and how their positions change during the night and across seasons. -
How can I start recognizing constellations?
Pick a few bright, simple patterns such as Orion or the Big Dipper. Once you know them, use their shapes as landmarks to trace lines to nearby constellations, and remember that the stars only seem grouped from our viewpoint on Earth. -
Why do many beginners try astronomy binoculars first?
Binoculars are easy to carry, quick to aim, and give a wide view, which helps you scan the Milky Way and locate star clusters. They are less complex than many beginner telescopes but show less fine detail on planets and very dim objects. -
How can a stargazing journal help my observing?
By recording date, time, location, weather, and what you viewed, a journal shows how the sky changes through the year. These notes also help you find favorite objects again and compare how different equipment or sites affected what you could see.